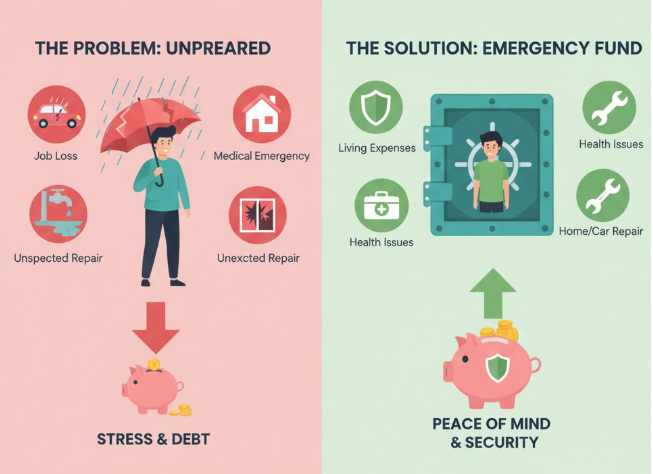
When life throws unexpected challenges — job loss, medical emergencies, car breakdowns, or sudden home repairs — your financial stability can crumble overnight. That’s why an emergency fund isn’t just a “good idea”; it’s your ultimate safety net. It helps you survive financial shocks without going into debt or stress.
In this guide, we’ll walk through how to build an emergency fund that truly covers every crisis, no matter how big or small. You’ll learn where to start, how much to save, smart strategies to grow it, and the best ways to manage it — all in simple, practical steps.
Why You Need an Emergency Fund More Than Ever
Emergencies don’t wait for the “right time.” They come uninvited.
A well-built emergency fund ensures that when a crisis strikes, you don’t have to rely on loans or credit cards.
Common Financial Emergencies Include:
-
Sudden medical bills or hospital stays
-
Job loss or pay cuts
-
Home or car repairs
-
Unexpected travel (family emergencies)
-
Natural disasters (floods, earthquakes, etc.)
-
Pet emergencies
According to financial surveys, over 55% of adults cannot cover a $1,000 emergency expense without borrowing. That’s a warning sign.
Having an emergency fund gives you:
✅ Peace of mind
✅ Protection from high-interest debt
✅ Confidence to face life’s uncertainties
✅ Freedom to focus on long-term goals
Step 1: Decide What Counts as a True Emergency
Before saving, it’s important to define what an emergency really is.
An emergency fund should not be used for vacations, impulse buys, or luxury shopping. It’s strictly for unexpected, urgent, and essential expenses.
| True Emergencies | Not Emergencies |
|---|---|
| Medical bills | Holiday gifts |
| Job loss | Shopping sales |
| Car or home repairs | Upgrading your phone |
| Family crisis travel | Dining out |
| Natural disaster | Buying new clothes |
This simple distinction helps you protect your fund from misuse.
Step 2: Set a Realistic Savings Goal
So, how much should your emergency fund hold?
There’s no one-size-fits-all answer — it depends on your income, expenses, and responsibilities.
The 3-Tier Rule:
| Type | Recommended Amount | Ideal For |
|---|---|---|
| Basic Fund | 1 month of living expenses | Beginners |
| Standard Fund | 3–6 months of expenses | Most individuals |
| Complete Fund | 9–12 months of expenses | Families or freelancers |
For example:
If your monthly expenses are $1,500, your 3-month emergency fund goal should be $4,500.
💡 Tip: Start small. Even $500 can handle small crises like car repairs or urgent bills.
Step 3: Calculate Your Monthly Living Expenses
To know your target, first calculate your monthly necessities. Focus only on essential expenses — the costs you’d still have if you lost your income tomorrow.
Your Monthly Essentials Might Include:
-
Rent or mortgage
-
Utilities (electricity, gas, water, internet)
-
Groceries
-
Insurance premiums
-
Transportation costs
-
Loan payments
-
Medical costs
Add these up to get your monthly survival budget.
Example Calculation:
| Expense Type | Monthly Cost (USD) |
|---|---|
| Rent | $800 |
| Utilities | $150 |
| Groceries | $300 |
| Transport | $100 |
| Loans & Insurance | $200 |
| Medical & Misc | $150 |
| Total Monthly Essentials | $1,700 |
Goal: For 3 months → $1,700 × 3 = $5,100 emergency fund target
Step 4: Choose the Right Place to Keep Your Fund
Your emergency fund should be easy to access but separate from your regular spending account.
Best Places to Store an Emergency Fund:
-
High-Yield Savings Account
-
Safe, insured, and earns interest.
-
Easy to withdraw when needed.
-
-
Money Market Account
-
Slightly higher interest, limited withdrawals.
-
-
Short-Term Fixed Deposit
-
Good for funds you don’t expect to use soon.
-
-
Hybrid Strategy:
-
Keep half in a savings account (for instant access).
-
Keep half in a money market or short-term deposit (for better returns).
-
Avoid keeping it in stocks or risky investments — markets can crash just when you need cash.
Step 5: Start Saving — Even If It’s Small
The hardest part is starting. But remember, something is always better than nothing.
Practical Ways to Build Your Emergency Fund:
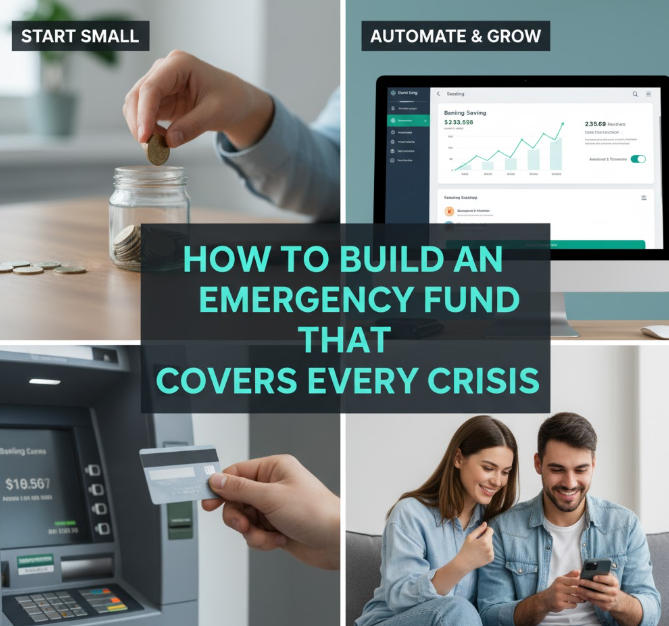
1. Automate Your Savings
-
Set up an automatic transfer to your emergency fund after every paycheck.
-
Treat it like a “bill” you must pay yourself first.
2. Save a Fixed Percentage of Income
A simple method is the 50/30/20 rule:
-
50% → Needs
-
30% → Wants
-
20% → Savings (part of this goes into the emergency fund)
3. Cut Unnecessary Expenses
You’d be surprised how small savings add up:
-
Cancel unused subscriptions
-
Cook at home instead of eating out
-
Shop during sales
-
Use energy efficiently
4. Use Windfalls Wisely
Put bonuses, tax refunds, or gifts directly into your fund.
5. Earn Extra Income
-
Freelance or start a side hustle
-
Sell unused items online
-
Offer tutoring, delivery, or part-time work
💡 Even saving $5–10 per day builds over time:
$10/day × 30 days = $300/month
$300 × 12 months = $3,600 a year!
Step 6: Track Your Progress with Milestones
Setting checkpoints keeps you motivated.
Milestone Strategy:
-
Save your first $100
-
Then hit $500 (basic emergency fund)
-
Next, $1,000 (minor crisis coverage)
-
Finally, 3–6 months’ worth of expenses
Use apps like Mint, YNAB, or PocketGuard to track progress visually.
Infographic: Emergency Fund Growth Ladder
Each step boosts your financial confidence!
Step 7: Protect Your Fund from Temptation
Your emergency fund should be untouchable except in real emergencies.
Golden Rules to Protect It:
-
Keep it in a separate account (not linked to debit cards).
-
Rename it “Emergency Only” in your bank app.
-
Don’t use it for vacations or impulse spending.
-
Refill it immediately if you withdraw from it.
Whenever you feel tempted, ask yourself:
“If I lost my job tomorrow, would I still be glad I spent this money?”
If the answer is no, don’t touch it.
Step 8: Rebuild After Using Your Fund
After a crisis, it’s natural to dip into your emergency savings.
The key is to rebuild it quickly — treat it as your top financial goal.
Steps to Rebuild Efficiently:
-
Pause luxury spending for a few months.
-
Automate weekly transfers again.
-
Use extra income to refill the fund.
-
Review your monthly budget and identify temporary cuts.
Your goal should be to restore the fund within 6–12 months.
Step 9: Adjust and Reassess Annually
Your life changes — so should your emergency fund.
Review It Every Year:
-
Did your monthly expenses increase?
-
Did you get married, have a baby, or move?
-
Did your income grow or shrink?
Adjust your fund size accordingly. For example:
-
Single → 3 months of expenses may be enough.
-
Family → 6–12 months is safer.
-
Self-employed → 12+ months gives more stability.
Regular check-ins keep your fund reliable.

Step 10: Combine Insurance and Emergency Savings
An emergency fund works best with the right insurance.
Insurance handles major risks; your fund covers smaller gaps.
| Need Type | Handled By | Example |
|---|---|---|
| Car accident | Auto insurance | Major repair costs |
| Health emergency | Health insurance | Hospital bills |
| Job loss or minor repairs | Emergency fund | Daily expenses |
Together, they give full protection against financial shocks.
How Long Does It Take to Build an Emergency Fund?
It depends on your income and savings rate.
Here’s an example breakdown:
| Monthly Income | Savings Rate | Monthly Contribution | Time to Reach $6,000 |
|---|---|---|---|
| $2,000 | 10% | $200 | 30 months |
| $3,000 | 15% | $450 | 13 months |
| $4,000 | 20% | $800 | 7.5 months |
Consistency matters more than speed.
Even slow, steady progress gives you growing protection over time.
Common Mistakes to Avoid
Building an emergency fund is simple — but many people make small mistakes that delay their success.
Top Mistakes to Watch Out For:
-
Using it for non-emergencies (vacations, gadgets, etc.)
-
Keeping it in risky investments like crypto or stocks
-
Not replenishing after withdrawal
-
Mixing it with regular savings
-
Saving too aggressively and ignoring short-term needs
Avoiding these ensures your fund stays solid when you truly need it.
Bonus: Creative Ways to Grow Your Emergency Fund Faster
-
Round-Up Apps: Automatically round up purchases to the next dollar and save the spare change.
-
No-Spend Challenges: Pick one week each month to spend only on essentials.
-
Cashback Rewards: Deposit cashback or points savings directly into your fund.
-
“Side Hustle Savings Rule”: Save 100% of side hustle income until your fund is complete.
-
Monthly Review: Revisit subscriptions, memberships, and recurring charges quarterly.
Visual Snapshot: Emergency Fund Planning Table
| Goal | Target Amount | Where to Keep It | Estimated Timeframe |
|---|---|---|---|
| Starter Fund | $500–$1,000 | Savings account | 3 months |
| Standard Fund | 3–6 months’ expenses | High-yield savings or money market | 1–2 years |
| Full Coverage Fund | 9–12 months’ expenses | Mixed accounts | 2–3 years |
Real-Life Example: Sarah’s Smart Emergency Fund Journey
Sarah, a 26-year-old graphic designer, started with $100/month savings.
Here’s how she built her safety net:
| Month | Action Taken | Emergency Fund Balance |
|---|---|---|
| 1–3 | Automated $100 monthly | $300 |
| 4–6 | Added freelance income ($200/month) | $900 |
| 7–12 | Cut subscriptions, sold unused items | $2,000 |
| 13–24 | Received a work bonus, invested half | $6,000 |
Within two years, Sarah had a 6-month emergency fund — and full peace of mind.
Final Thoughts: Build It Before You Need It
An emergency fund isn’t built overnight, but it’s the most powerful financial foundation you can create.
It protects you from debt, reduces stress, and lets you handle any crisis with confidence.
Quick Recap: The 10 Steps to Build a Solid Emergency Fund
-
Define what counts as an emergency
-
Set your savings goal (1–12 months of expenses)
-
Calculate your monthly essentials
-
Choose a safe place for the fund
-
Start saving consistently
-
Track progress with milestones
-
Protect your fund from misuse
-
Rebuild it after use
-
Review annually
-
Pair it with insurance for full coverage
Every dollar you save today is a step toward financial freedom and peace of mind tomorrow.
Start now — your future self will thank you.

